

Chocolate tempering transforms ordinary melted chocolate into a glossy, professional-quality product with satisfying snap and superior mouthfeel. This comprehensive guide covers everything from basic tempering science to advanced techniques, ensuring your chocolate creations achieve bakery-worthy results every time.
Understanding Chocolate Tempering
Chocolate tempering involves manipulating cocoa butter crystals through precise temperature control to create stable crystalline structures. The tempering process organizes cocoa butter's polymorphic crystals into their most stable form (Type V), which provides chocolate with its desirable qualities. According to research by Dr. Emmanuel Ohene Afoakwa in the International Journal of Food Science, "The polymorphic crystallization of cocoa butter is central to chocolate's physical properties, with Type V crystals being responsible for the characteristic snap, gloss, contraction, and melting properties of properly tempered chocolate."
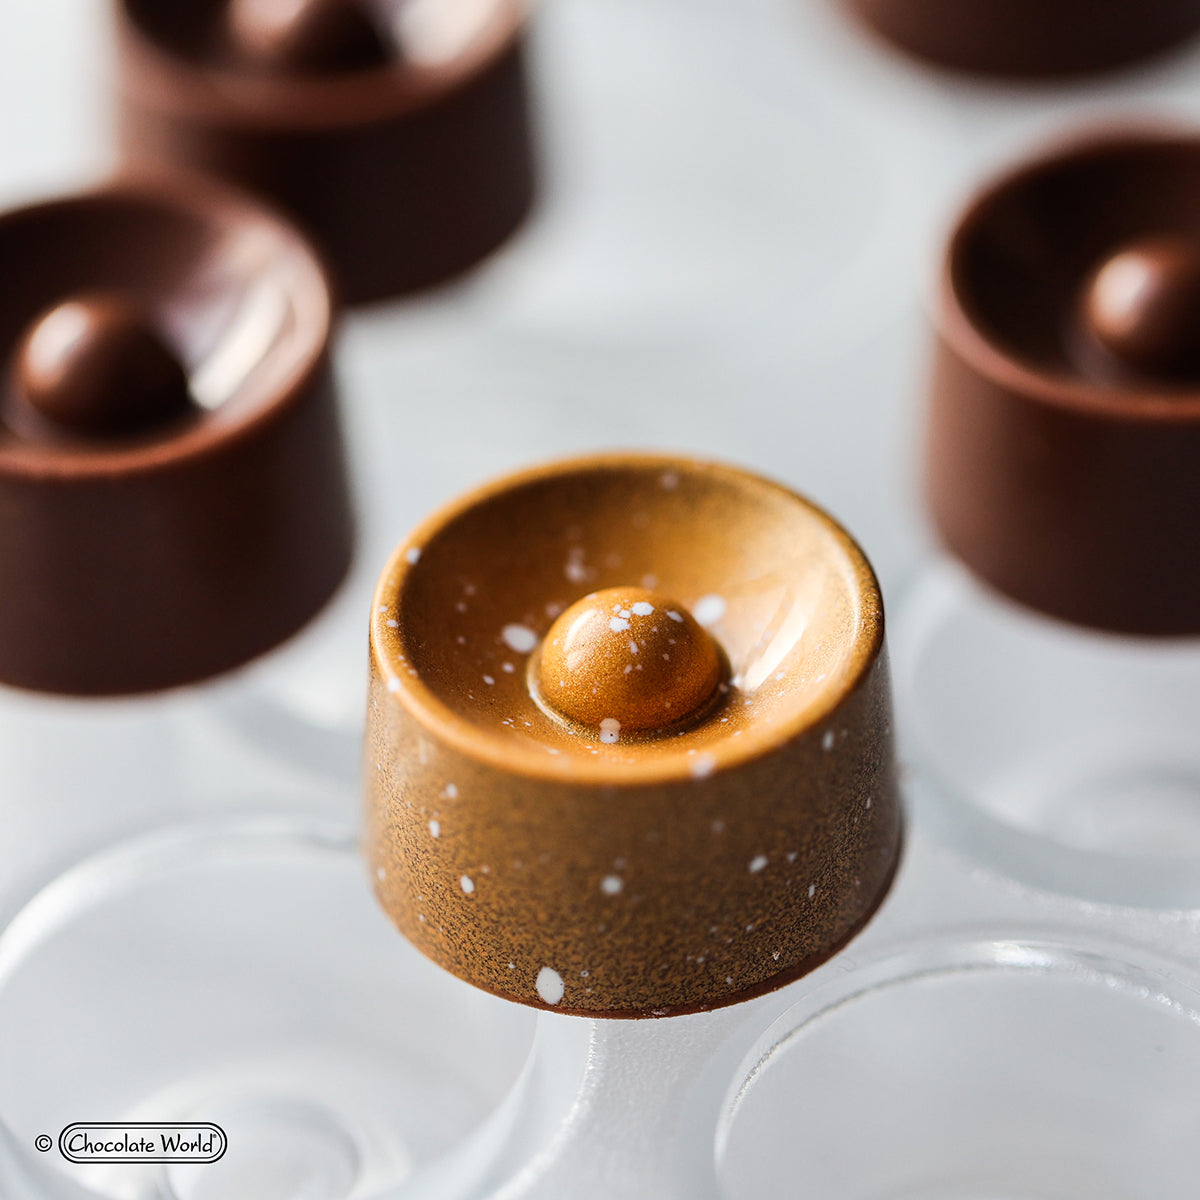
Properly tempered chocolate possesses a glossy surface, clean snap, smooth texture, and resists blooming during storage. When chocolate lacks proper tempering, it develops a dull appearance, soft texture, and quickly forms whitish bloom as unstable crystals migrate to the surface. As noted by chocolate scientist Rodney Süsswein, "Proper chocolate tempering is essential not only for appearance but also extends shelf life by creating a stable crystalline network that resists fat migration and oxidation."
Chocolate Types and Their Tempering Requirements
Different chocolate varieties require specific temperature ranges due to their unique composition of cocoa solids, cocoa butter, milk fats, and sugars. Dark chocolate contains higher cocoa solids percentages (typically 55-85%) and requires tempering at 31-32°C (88-90°F) for optimal crystal formation. Milk chocolate, with its added milk solids and reduced cocoa percentage, requires a lower tempering temperature of 30-31°C (86-88°F) to accommodate the influence of milk fats. White chocolate, composed primarily of cocoa butter, sugar, and milk solids with no cocoa solids, demands the lowest tempering temperature at 28-29°C (82-84°F) to prevent overheating of its delicate structure.
The following table outlines the precise temperature requirements for tempering each chocolate type:
| Chocolate Type | Melting Temperature | Working Temperature | Cooling Temperature |
|---|---|---|---|
| Dark Chocolate | 45-50°C (115-120°F) | 31-32°C (88-90°F) | 27-28°C (80-82°F) |
| Milk Chocolate | 40-45°C (105-115°F) | 30-31°C (86-88°F) | 26-27°C (78-80°F) |
| White Chocolate | 40-45°C (105-113°F) | 28-29°C (82-84°F) | 24-25°C (75-77°F) |
Essential Tempering Tools
A high-quality chocolate thermometer provides the precision necessary for successful tempering with accuracy to within 1°C/°F. Digital instant-read thermometers offer the most reliable readings, while infrared thermometers allow for non-contact temperature assessment that prevents contamination. Some professional chocolatiers prefer thermocouple probes that can remain in the chocolate throughout the tempering process for continuous monitoring.
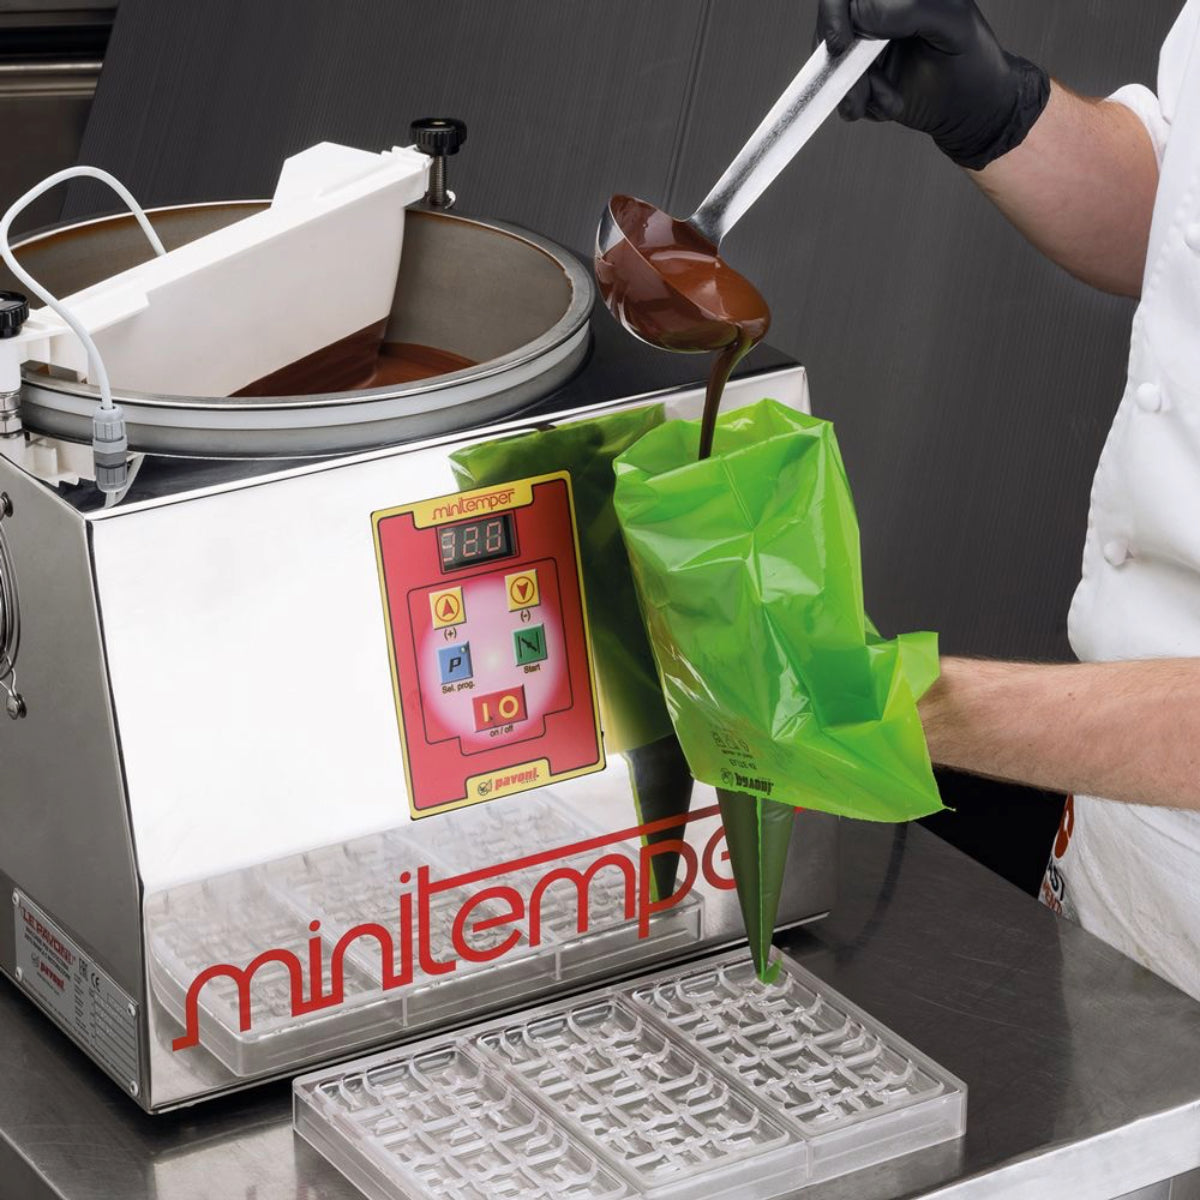
Effective heating equipment options include double boilers that provide gentle indirect heat, microwave ovens for quick interval heating, and dedicated chocolate melters for consistent temperature maintenance. Additional helpful tools include heat-resistant silicone spatulas, stainless steel bowls, marble slabs for tabling, scrapers for agitation, and good-quality molds for finished products. Research from the Chocolate Academy indicates that "Professional equipment choices significantly impact tempering success rates, with precise temperature control being the most critical factor in achieving consistent results."
The Classic Seeding Method
The seeding method represents the most accessible tempering technique for home chocolatiers using pre-crystallized chocolate to "seed" melted chocolate with stable crystals. Begin by melting two-thirds of your chocolate to the appropriate melting temperature for your chocolate type, then remove from heat. Add the remaining one-third of finely chopped, tempered chocolate (the "seed") gradually while stirring continuously, allowing the stable crystals to propagate throughout the mixture. Continue stirring until all added chocolate has melted and the temperature has dropped to the appropriate working temperature for your chocolate type.
The optimal seed ratio depends on chocolate type, room temperature, and batch size, but generally follows these guidelines:
- Dark chocolate: 25-30% seed chocolate
- Milk chocolate: 20-25% seed chocolate
- White chocolate: 15-20% seed chocolate
Troubleshooting common seeding issues involves monitoring temperature precisely, as overheating destroys seed crystals while insufficient heating leaves unmelted chunks. If your chocolate becomes too thick during seeding, gently rewarm it 1-2 degrees, being careful not to exceed the working temperature range. When chocolate loses its temper during work, incorporate additional tempered seed chocolate while maintaining the working temperature.
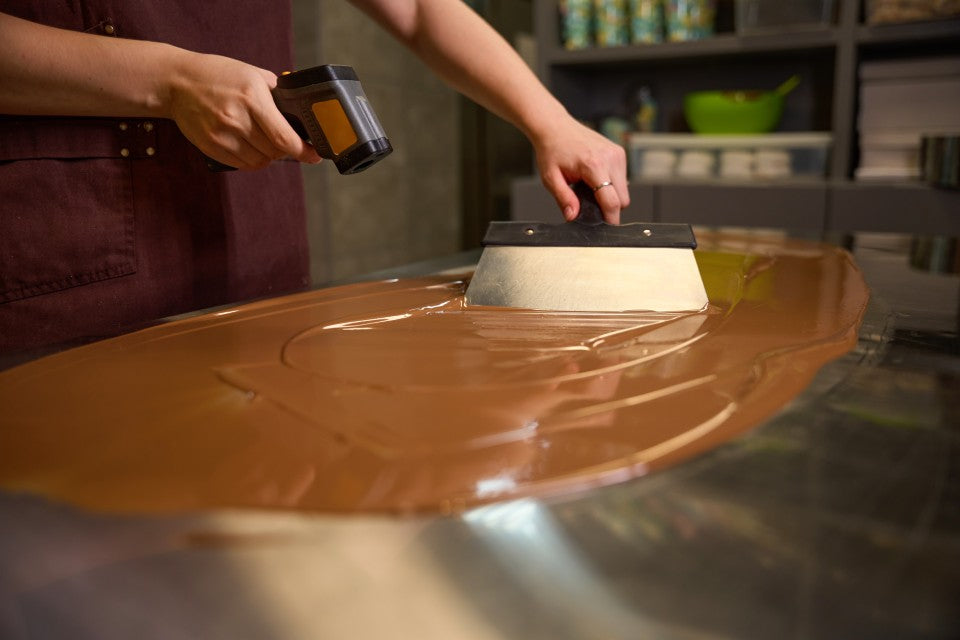
The Professional Tabling Method
Professional chocolatiers often prefer the tabling method for its precision and reliability in commercial settings where large batches are tempered. This technique involves pouring two-thirds of melted chocolate onto a cool marble slab and continuously working it with scrapers to promote crystallization. The agitation and cooling process spreads chocolate into thin layers, then gathers it repeatedly, incorporating air and reducing temperature quickly to form stable crystals. Once the chocolate begins to thicken slightly, return it to the bowl containing the remaining warm chocolate and mix thoroughly to achieve the optimal working temperature.
Tabling requires skill development but produces superior results for decorative work and fine chocolates. Master chocolatier Jean-Pierre Wybauw notes, "The tabling method allows for greater control over crystallization and produces more stable temper with superior gloss, particularly important for showpiece work and thin-shelled confections." This method works exceptionally well for dark chocolate, which has a more forgiving working temperature range than milk or white varieties.
Modern Tempering Approaches
Sous vide tempering offers exceptional precision using a water bath with temperature controlled to within 0.1°C/°F. Place chocolate in a sealed bag, submerge in a water bath set to the exact working temperature for your chocolate type, and allow it to melt and crystallize over 45-60 minutes without stirring. This method completely eliminates temperature fluctuation concerns and extends working time significantly, making it ideal for complex chocolate work requiring extended manipulation.
Microwave tempering provides quick results by using short bursts of power with thorough stirring between intervals. Heat chocolate to melting temperature, then add seed chocolate and continue heating in 5-10 second intervals at 50% power while stirring constantly. This approach requires vigilant temperature monitoring but minimizes equipment needs and works well for small batches. Dedicated chocolate tempering machines automate the entire tempering cycle with built-in heating, cooling, and agitation systems that maintain precise temperature control. These devices offer convenience for frequent chocolate work but involve higher investment and learning curve for proper operation.
Perfect Temperature Control
Successful tempering depends on hitting specific temperature points during each phase of the process. The initial melting phase must completely eliminate all crystal structures by heating chocolate beyond the melting point of all crystal forms (typically 45-50°C/115-120°F). The cooling phase facilitates the formation of both stable and unstable crystal forms as temperature decreases to slightly below the working temperature. The working phase stabilizes the mixture at the precise temperature that maintains Type V crystals while eliminating less stable forms.
The following list details critical temperature considerations for successful tempering:
- Avoid exceeding 50°C/122°F to prevent burning chocolate
- Cool chocolate gradually to prevent shock crystallization
- Maintain working temperature within ±1°C of target
- Control ambient room temperature (20-22°C/68-72°F ideal)
- Use proper equipment for temperature verification
- Account for residual heat from bowls and utensils
Environmental factors significantly impact temperature control during tempering. High humidity can cause sugar bloom as moisture condenses on chocolate's surface and dissolves sugar, which then recrystallizes in undesirable formations. Working in rooms warmer than 24°C/75°F makes maintaining proper chocolate temperature extremely difficult. Air currents can create temperature variations across the chocolate's surface, resulting in uneven crystallization.
Common Tempering Problems
Chocolate bloom manifests as whitish discoloration on chocolate's surface in two distinct forms: fat bloom and sugar bloom. Fat bloom occurs when unstable cocoa butter crystals migrate to the surface and recrystallize, creating a grayish film that indicates improper tempering. Sugar bloom appears as rough, whitish patches caused by moisture dissolving and recrystallizing sugar crystals, typically resulting from temperature fluctuations during storage. Research published in Food Structure by Dr. James Hartel found that "Chocolate bloom formation is directly correlated with improper crystal structure, with Type V crystal networks providing significantly greater resistance to bloom formation during storage."
Overheated chocolate requires careful recovery by cooling to proper working temperature through gentle agitation, then adding freshly tempered seed chocolate. Temperature fluctuation issues often stem from improper equipment, inadequate stirring, or unsuitable working environments. Consistency problems typically indicate insufficient crystal formation, requiring additional seeding or prolonged agitation at proper working temperature to increase crystal network development.
| Problem | Cause | Solution |
|---|---|---|
| Dull finish | Insufficient stable crystals | Add more seed chocolate, increase agitation |
| Streaky appearance | Uneven crystallization | Ensure thorough mixing at consistent temperature |
| Soft texture | Working temperature too high | Cool slightly, add more seed chocolate |
| Spotty surface | Temperature fluctuations | Work in controlled environment, use water bath |
| Thick consistency | Too many crystals formed | Gently warm to dissolve excess crystals |
Working with Tempered Chocolate
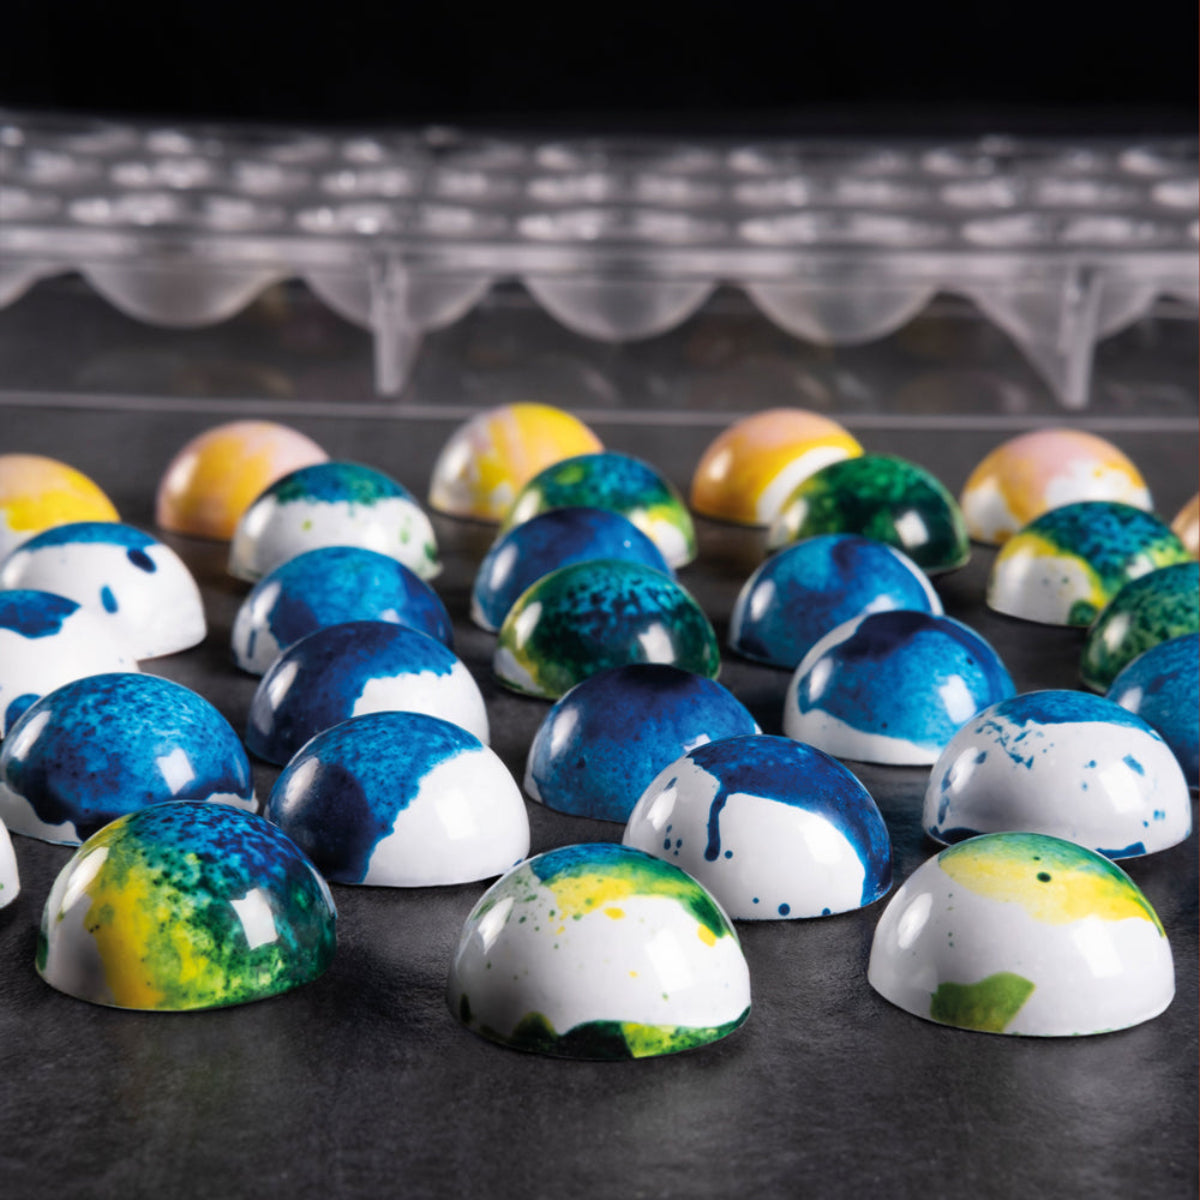
Molded chocolate requires properly tempered chocolate that will contract slightly upon cooling, releasing cleanly from polycarbonate or silicone molds. Pour tempered chocolate into clean, dry molds at optimal working temperature, tap gently to release air bubbles, and allow to set completely at 15-18°C (59-65°F) before unmolding. For hollow forms like Easter eggs, coat molds with an even layer of chocolate, pour out excess, and allow to set before joining pieces with additional tempered chocolate.
Dipping techniques involve maintaining chocolate at proper working temperature throughout the process, often using a chocolate dipping fork to submerge items completely. Allow excess chocolate to drip off before placing dipped items on parchment paper, taking care not to touch or move items until completely set. For coating larger items or creating enrobed confections, tempered chocolate should be slightly cooler (toward the lower end of the working range) to build appropriate thickness without excess runoff.
Creating decorative elements requires chocolate held at the perfect working temperature for optimal flexibility and shine. Common decorative techniques include:
- Chocolate curls created by scraping semifirm chocolate across a flat surface
- Chocolate cigarettes formed by spreading thin layers that are rolled while semifirm
- Transfer sheets with cocoa butter designs pressed into fresh tempered chocolate
- Piped decorations using paper cones or piping bags with fine tips
- Chocolate shards created by spreading thin layers that are broken after setting
Professional Tips for Success
Ambient conditions significantly impact tempering success, with ideal workspace temperature between 20-22°C (68-72°F) and humidity below 50%. According to research by the Confectionery Manufacturing and Retailing journal, "Environmental factors account for approximately 40% of tempering failures in professional settings, with temperature fluctuations being the primary culprit." Avoid working near ovens, dishwashers, or direct sunlight that create temperature variations and humidity changes.
Batch size management affects tempering technique selection and success rates. Small batches (under 500g) cool quickly and require more vigilant temperature monitoring, while large batches (over 2kg) maintain temperature longer but require more physical effort to manipulate. For optimal results with different batch sizes:
- Small batches (up to 500g): Microwave or seeding method works well
- Medium batches (500g-2kg): Seeding method provides reliable results
- Large batches (over 2kg): Tabling method or tempering machine recommended
Time-saving techniques include pre-tempering larger batches that can be held at working temperature while completing project components. Many professionals maintain a tempered chocolate reservoir in a tempering machine or water bath held at working temperature. Partially tempered chocolate can be stored overnight if properly insulated and gently rewarmed and seeded the next day to restore proper crystallization.
FAQ: Chocolate Tempering Essentials
What exactly happens during chocolate crystallization? Cocoa butter forms six different crystal structures (polymorphs) with Type V being the most stable form that provides ideal properties in finished chocolate.
Can I temper chocolate without a thermometer? While possible using visual and tactile cues, a thermometer dramatically increases success rates by ensuring precise temperature control throughout the tempering process.
How can I tell if my chocolate is properly tempered? Properly tempered chocolate dries quickly with high gloss, snaps cleanly when broken, and remains stable at room temperature without becoming soft or developing bloom.
Why does my chocolate seize when tempering? Seizing occurs when moisture contacts chocolate or when overheating causes cocoa solids and cocoa butter to separate, resulting in a thick, grainy mass that cannot be properly tempered.
Can I re-temper chocolate that has lost its temper? Yes, previously tempered chocolate can be completely remelted to destroy all crystal structures and then tempered again following standard procedures.
How long does tempered chocolate remain in temper? Tempered chocolate maintains its working properties for 4-6 hours if held at proper working temperature, though quality gradually diminishes with extended holding time.
Do different chocolate brands require different tempering techniques? Different brands may have slightly varied optimal tempering temperatures due to formulation differences, with higher-quality couverture generally requiring more precise temperature control.
Can I add flavorings to chocolate while tempering? Oil-based flavorings can be added during tempering, but water-based additives will cause seizing, and any additions may alter optimal working temperature.
What's the minimum cocoa butter percentage needed for proper tempering? Chocolate requires at least 32% cocoa butter content for proper tempering, which is why true couverture chocolate contains 32-39% cocoa butter.
Is compound chocolate an acceptable alternative to tempered chocolate? Compound chocolate (made with vegetable fats instead of cocoa butter) doesn't require tempering but lacks the flavor complexity, shine, and snap of properly tempered real chocolate.
How does commercial tempering differ from home methods? Commercial operations use continuous tempering machines that maintain precise temperature while constantly circulating chocolate for extended production runs.
Can tempering be done in humid environments? While challenging, tempering in humid environments is possible by controlling the workspace with dehumidifiers and avoiding temperature fluctuations that cause condensation.
What causes white spots on my tempered chocolate? White spots typically indicate sugar bloom (rough, crystalline appearance) or fat bloom (smooth, waxy appearance), both resulting from improper tempering or storage.
How does seed chocolate quality affect tempering results? The seed chocolate must be properly tempered itself to provide stable crystal structures, as poorly tempered seed cannot induce proper crystallization in the melted chocolate.
Can I speed up the setting process for tempered chocolate? While refrigeration accelerates setting, it risks condensation and bloom formation; setting at 15-18°C (59-65°F) in a cool, dry environment provides optimal results.


Leave a comment
All comments are moderated before being published.
This site is protected by hCaptcha and the hCaptcha Privacy Policy and Terms of Service apply.